Why build your own VPN?
Many people want to use VPN. They don’t want to buy a third-party “VPN account”. In addition to being unstable, they are also afraid of insecurity. Some third-party VPNs will get user data to do some bad things, and also limit the speed of the network.
So you can buy a server yourself, and then build a VPN that is completely your own, stable and fast!
Then let’s teach you how to use Bandwagon Host (a cost-effective cloud server provider) to quickly build your own VPN. And I will also tell you how to spend less than others to buy a server, the following will mention how to get the coupon code.
Preparation before building a VPN
A computer with internet access.
PayPal account
Buy Bandwagon Host VPS Cloud Server
Click on the official website of Bandwagon to enter the official website of Bandwagon (you will receive a coupon code from here). After entering, you can see the VPS cloud server that you can purchase. If you use it personally, you can buy the cheapest one.
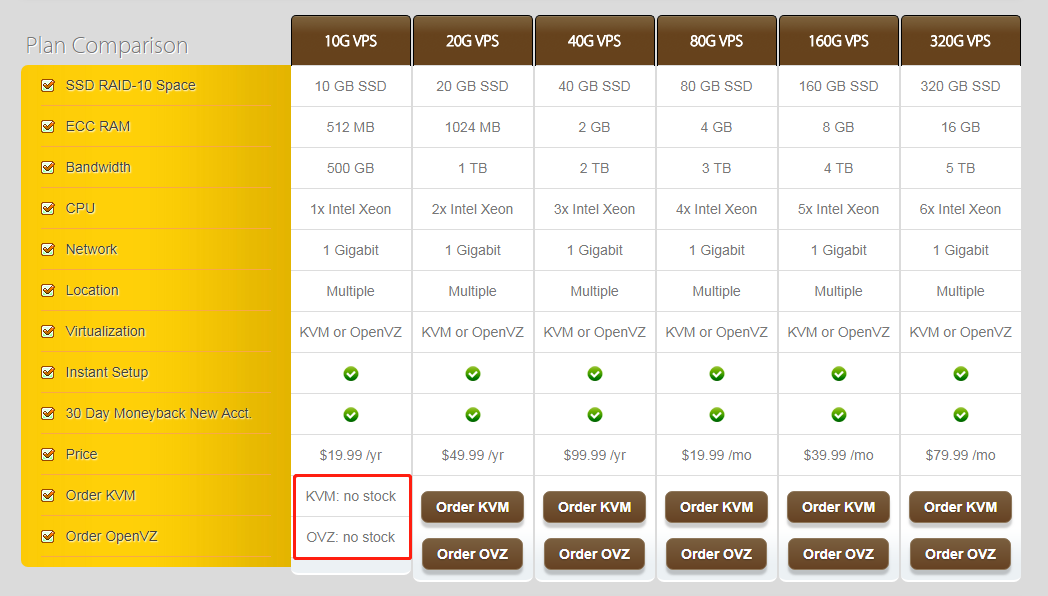
For example, there is a $19.99 one year is good:
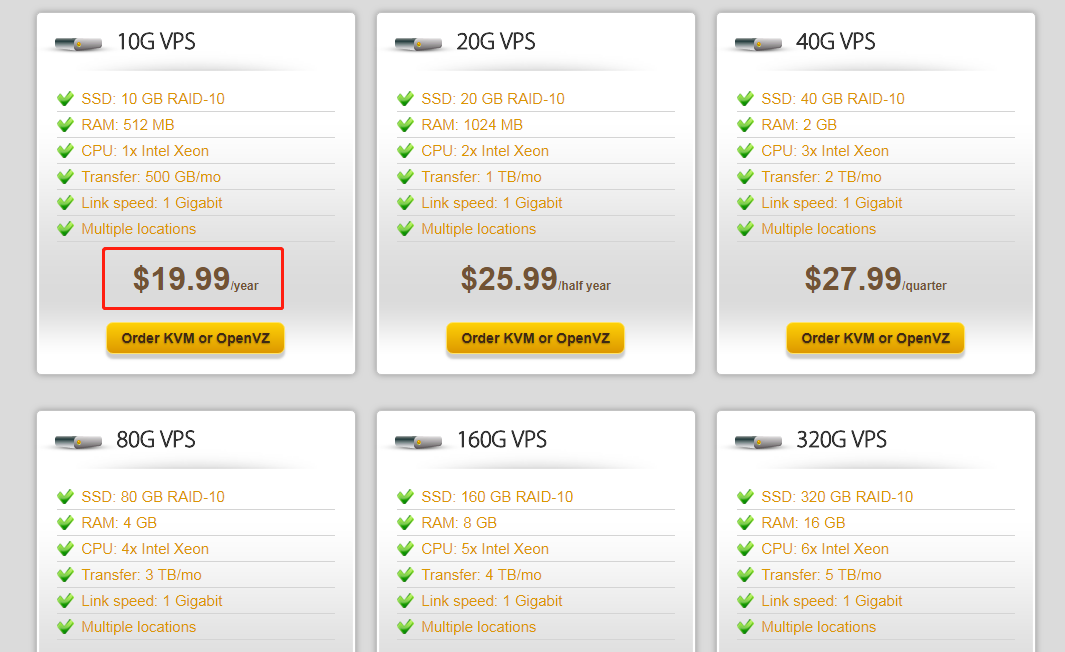
However, it is very cheap and very popular, and will soon be bought by people. For example, no stock here means that people have bought it.
Get Bandwagon Host Coupon Code
Ok, we click on “Order KVM”:

When you get to this page, don’t rush to add “Add to Cart” to the shopping cart. There is a coupon code hidden inside. Many people don’t know, use the browser to view the source code.
For chrome browser, press F12, then search for “code”(Use the shortcut Ctrl + F). You will find a “Try this promo code: xxxx”. This xxxx is the coupon code. You can copy it and it will be useful later.
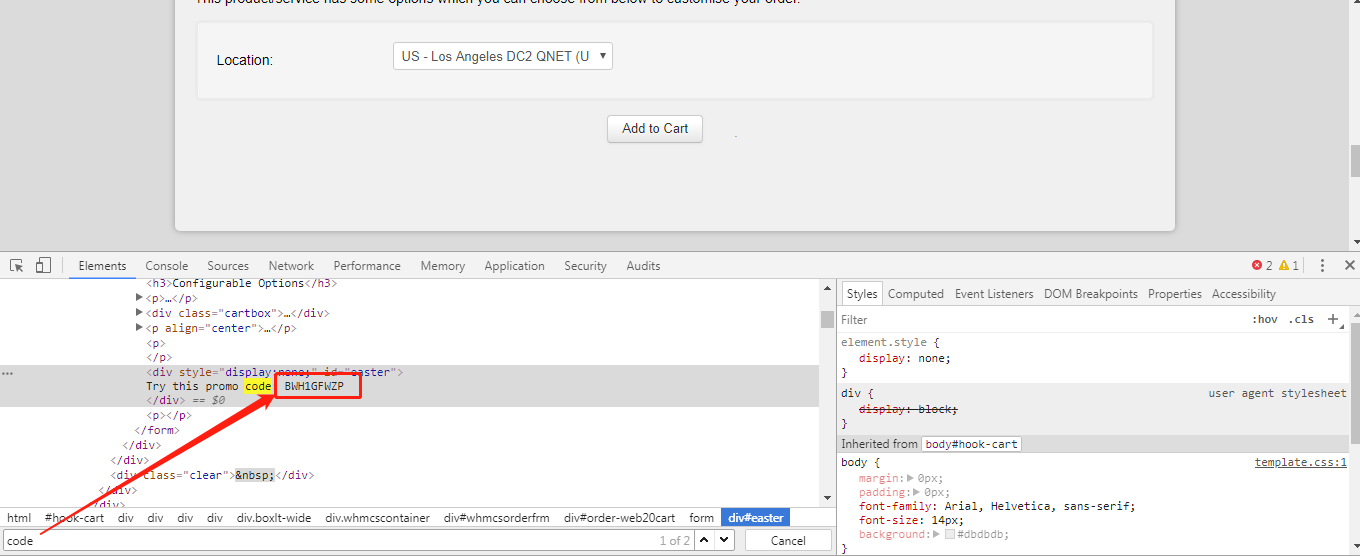
The location of the page is to select the address of the server. When you visit Google, it will display the address you are currently accessing. Ok, let’s click on “Add to Cart”.
Next, enter the settlement page, the coupon code we just copied comes in handy, copy the coupon code you just copied and click “Validate Code” to see! Is it a discount!

Then click “CheckOut” to complete the payment.
Quickly build your own VPN
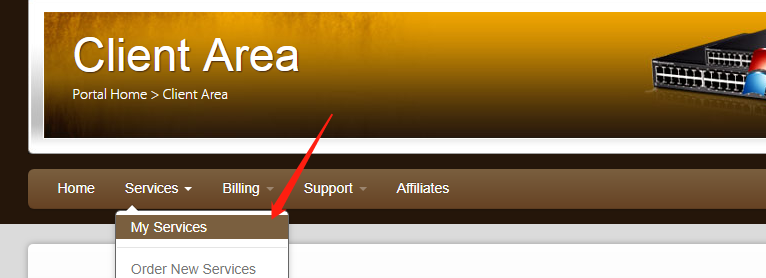
After the purchase, you will have a server of your own, and then click MyServices under Services, you can see your server:
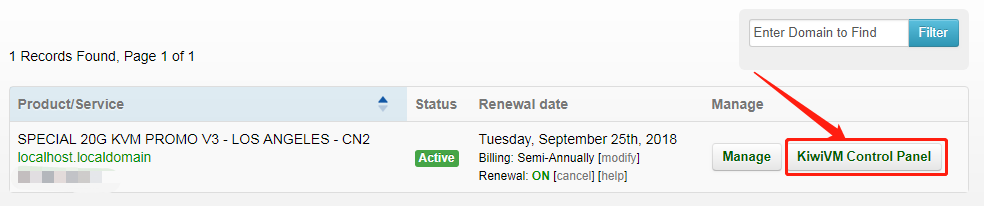
We click on “KiwiVM Control Panel” to enter the management interface:
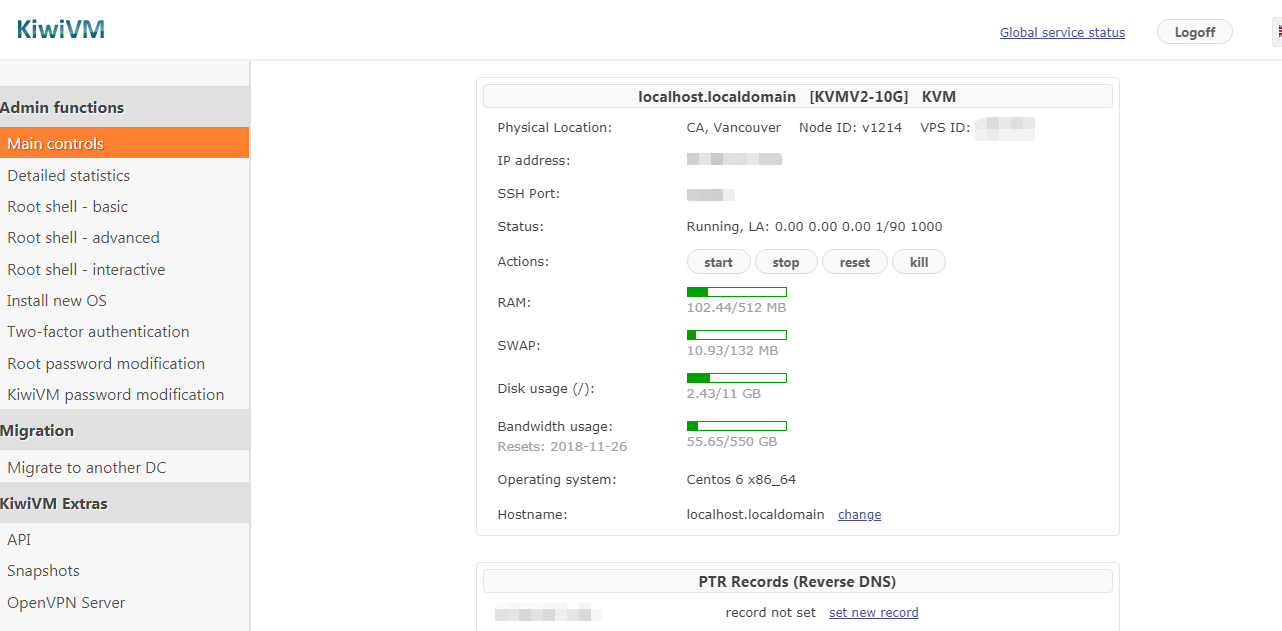
You can see the information of your server:
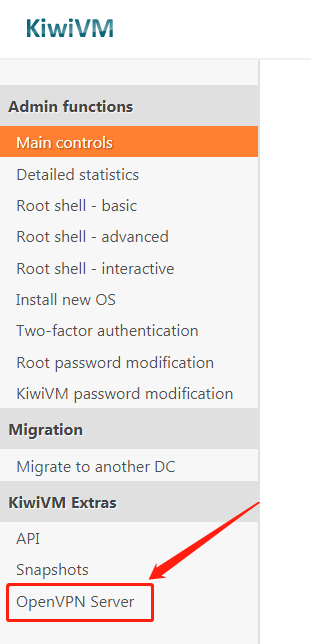
Then we click on “OpenVPN Server”:
Then click: “Install and configer OpenVPN Server”, Bandwagon will automatically help us install and configure the server, do not need to manually knock the command:
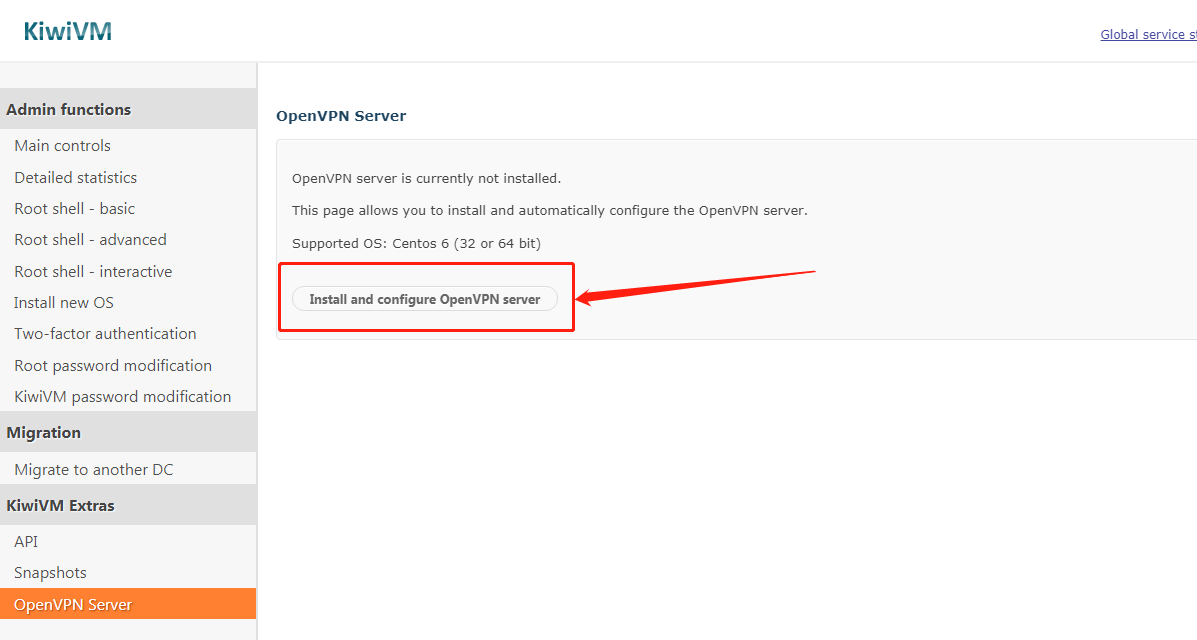
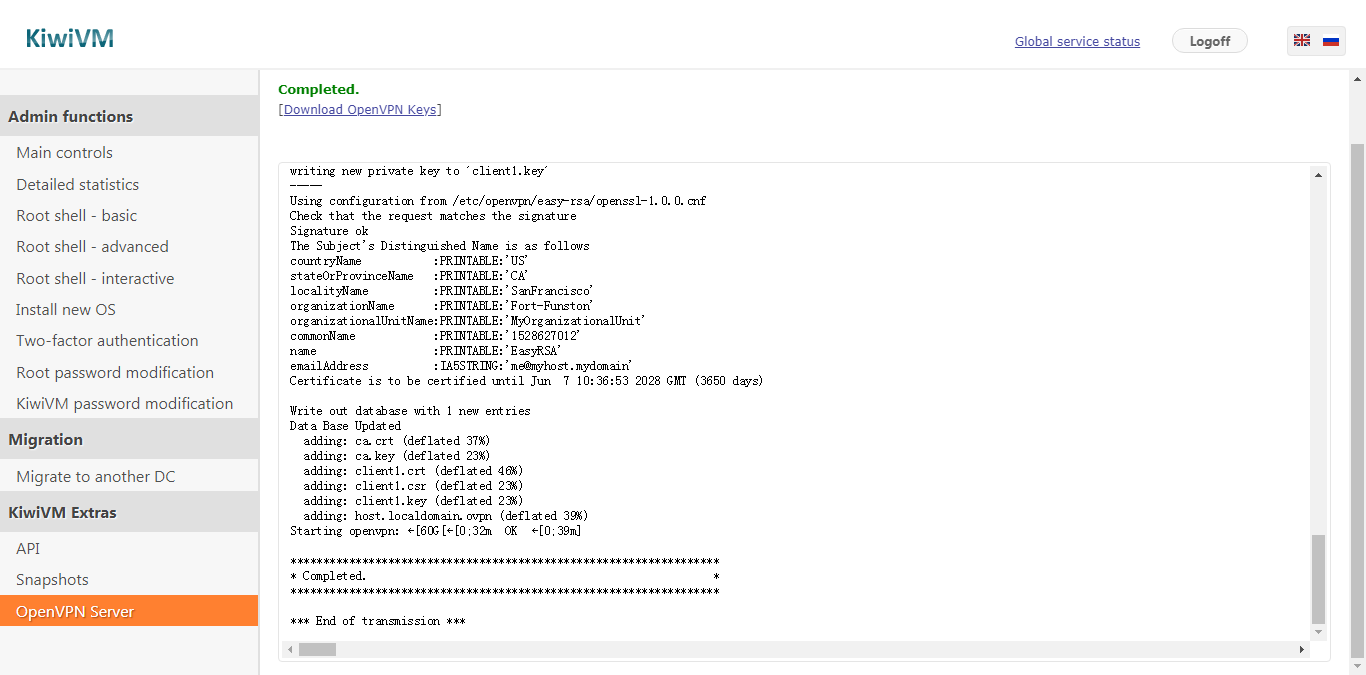
Wait a minute to set up a VPN, is it fast?
Use openVPN
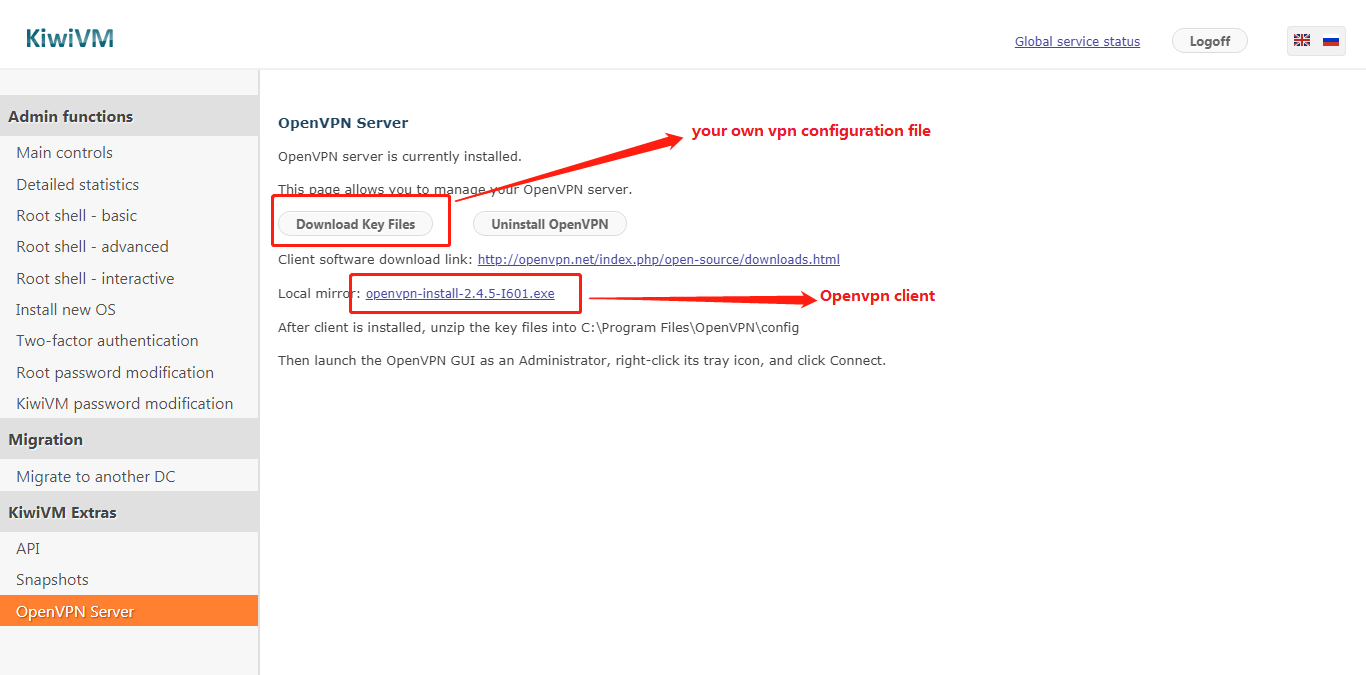
First we download the configuration file required for our VPN file, click “Download key Files” to download, and then download the openVPN client:
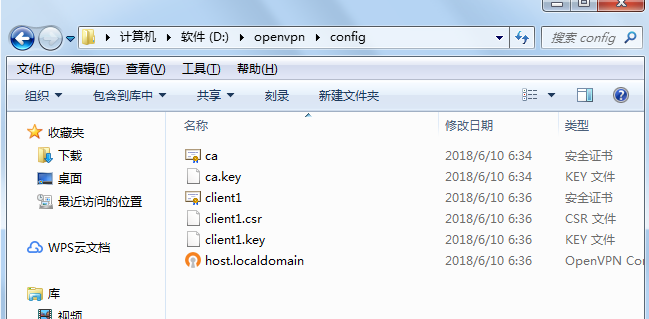
Then extract the configuration file to the config folder of the openVPN client:

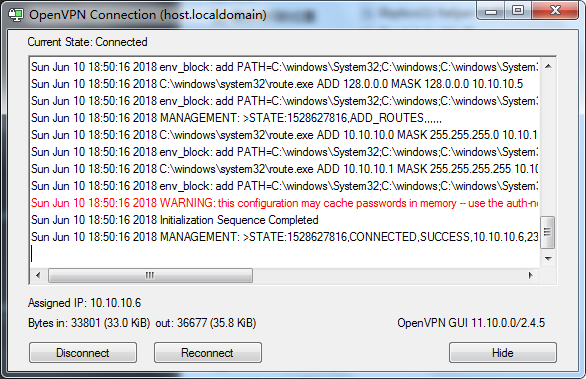
Then open the openvpn-gui in the bin directory of the openvpn directory, and then Connect, the openVPN in the lower right corner will become green, and then you can access the Internet through vpn, the speed is very fast: